
Bread Slicer Hacks: 5 Ways to Improve Your Baking Game
Table of Contents
Introduction: Can You Slice Bread Like a Pro?
Have you ever wondered why your homemade bread slices look uneven, crumbly, or just plain messy compared to the perfectly uniform slices at bakeries? The secret might not lie in your baking skills but in how you’re slicing your loaf. Enter the bread slicer —a tool that can take your baking game from amateur to professional in no time! Whether you’re a seasoned baker or just starting out, these five bread slicer hacks will help you achieve bakery-worthy results every time. Ready to slice like a pro? Let’s get started.
Overview: Why This Guide is a Must-Read
This guide is designed to teach you how to use a bread slicer effectively while offering clever hacks to improve your slicing technique. Each hack takes minimal time—most are quick adjustments you can make before slicing—and the difficulty level is beginner-friendly. With these tips, you’ll save time, reduce waste, and enjoy beautifully sliced bread for sandwiches, toast, or sharing with friends and family. Plus, we’ll cover storage tips, creative uses for your bread slicer, and answers to common questions so you feel confident every step of the way.
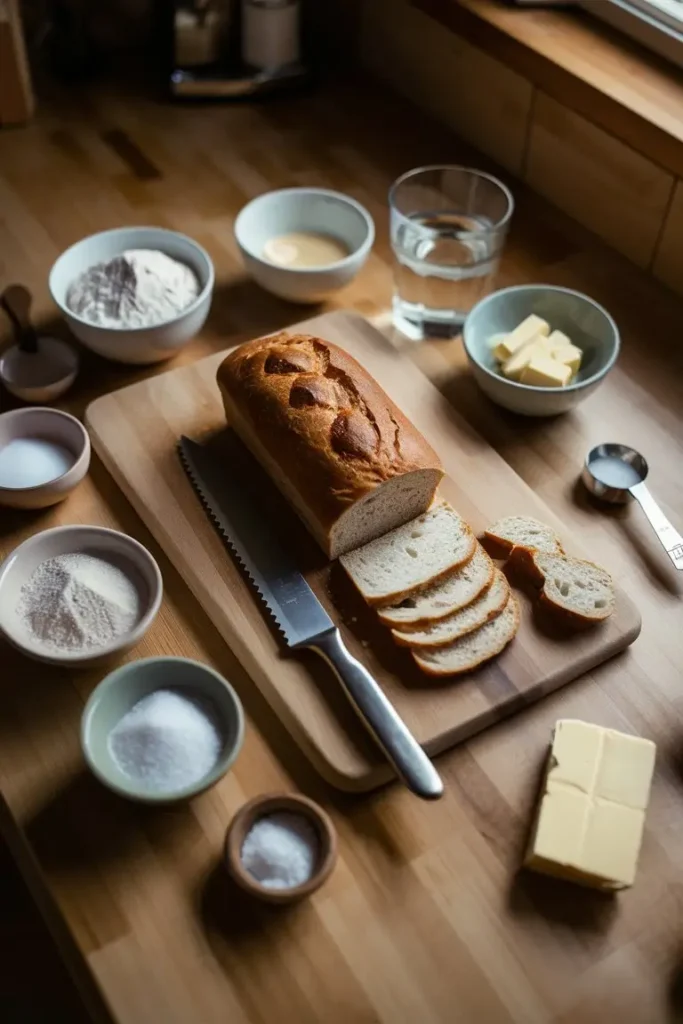
Essential Ingredients: What You’ll Need
Before diving into the hacks, let’s talk about the essentials for slicing bread like a pro:
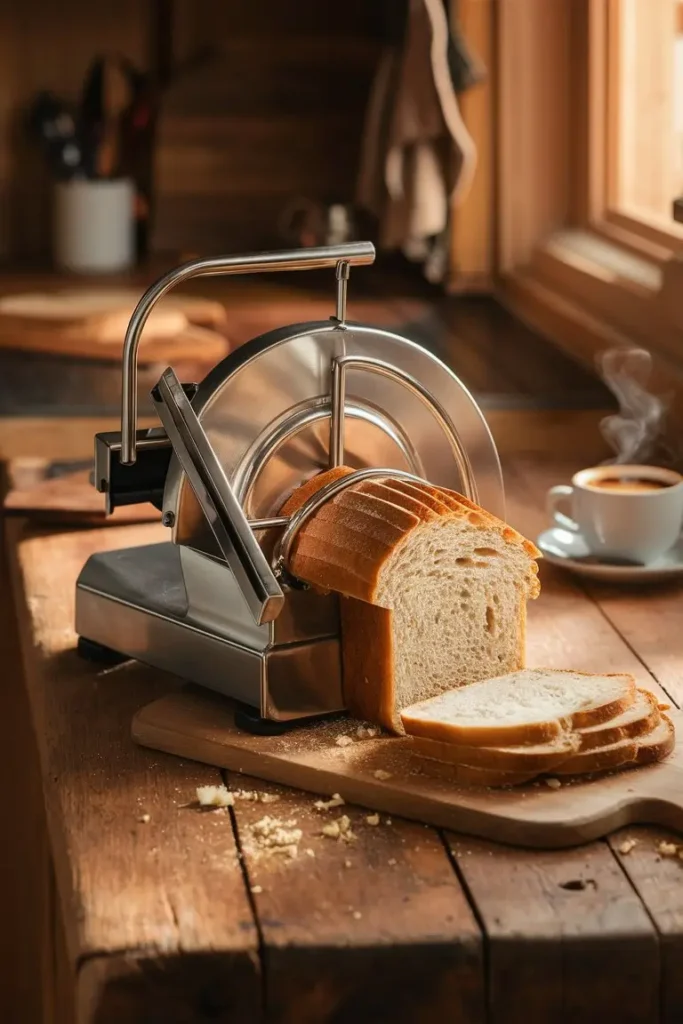
- A Quality Bread Slicer : Look for one with adjustable settings for slice thickness if possible. Electric slicers work well for large batches, while manual slicers are great for home bakers.
- Serrated Knife (Optional) : If you don’t have a slicer yet, a sharp serrated knife can mimic some slicing techniques until you invest in a proper tool.
- Cooling Rack : Freshly baked bread needs to cool slightly before slicing to avoid squishing or crumbling.
- Bread Keeper or Holder : Keeps the loaf steady during slicing, reducing crumbs and uneven cuts.
Substitutions and Variations :
- Use a clean cardboard box as a makeshift bread holder if you don’t own a slicer stand.
- For gluten-free or softer loaves, consider using a sawing motion instead of pressing down hard on the blade.
Step-by-Step Instructions: Mastering Your Bread Slicer
Let’s break down the process into simple steps so you can slice your bread cleanly and efficiently.
Hack 1: Flip the Loaf Upside Down
Professional bakers swear by this trick! Flipping the loaf upside down stabilizes its structure because the bottom crust is firmer than the top. Place the loaf upside down in your bread slicer or holder, then proceed to cut. This reduces the risk of squishing soft, fluffy bread.
Hack 2: Adjust Slice Thickness Settings
If your bread slicer has adjustable settings, experiment with different thickness levels based on your needs. Thin slices are perfect for sandwiches, while thicker slices work better for toast or French toast. Consistent slice sizes also ensure even cooking when reheating leftovers.
Hack 3: Let the Bread Cool First
Hot bread tends to be fragile and more likely to crumble during slicing. Allow your freshly baked loaf to cool on a wire rack for at least 30 minutes before slicing. This gives the gluten network time to set, resulting in cleaner cuts.
Hack 4: Lubricate Blades Regularly
For electric or mechanical slicers, keeping the blades lubricated ensures smooth operation and extends their lifespan. Avoid spraying water directly onto the blades; instead, wipe them down after each use and apply food-safe lubricant monthly.
Hack 5: Use Guides for Precision
Most bread slicers come with built-in guides or grids to help you maintain consistent slice widths. Position your loaf carefully within the guide before slicing. If your slicer doesn’t have guides, create DIY ones by attaching wooden strips to a cutting board.
Pro Tip: Always start slicing slowly to avoid mistakes. Once you’ve got the hang of it, you can increase speed without sacrificing precision.
Assembly: Combining Techniques for Perfect Results
Now that you know the hacks, here’s how to combine them for flawless slicing:
- Prepare Your Workspace : Set up your bread slicer on a stable surface. Ensure there’s enough room for the entire loaf.
- Stabilize the Loaf : Insert the loaf upside down into the slicer or holder. Secure it firmly to prevent movement.
- Adjust Settings : Choose your desired slice thickness and lock the setting in place.
- Slice Slowly : Begin slicing gently, allowing the slicer to do most of the work. Avoid forcing the blade through the bread.
- Check Results : Inspect each slice for consistency. Adjust positioning or settings as needed.
Presentation Tip: Arrange slices neatly on a plate or platter for serving. Dust lightly with flour or garnish with herbs for an extra touch of elegance.
Storage and Make-Ahead Tips
Once sliced, store your bread properly to keep it fresh:
- Room Temperature Storage : Keep slices in an airtight container or zip-top bag for up to 2 days. Avoid plastic wrap, which traps moisture and makes bread soggy.
- Freezer Option : Freeze individual slices in a single layer on a baking sheet, then transfer them to a freezer-safe bag. Reheat frozen slices in a toaster or oven for best results.
- Reheating Tips : Toast frozen slices directly for crispy edges or warm them in the microwave wrapped in a damp paper towel for softer bread.
If you anticipate frequent slicing, prepare multiple loaves ahead of time and freeze pre-sliced portions for convenience.
Recipe Variations: Get Creative!
Don’t limit yourself to traditional bread recipes—try these fun twists:
- Herb-Infused Bread : Add rosemary, thyme, or garlic powder to dough before baking for flavorful slices.
- Sweet Bread Varieties : Bake cinnamon swirl or chocolate chip loaves for dessert-worthy slices.
- Gluten-Free Options : Experiment with almond flour or oat-based blends for allergen-friendly alternatives.
Conclusion: Elevate Your Baking Game Today
Congratulations—you now have the tools and knowledge to master the art of slicing bread with a bread slicer! These five hacks will not only improve your slicing technique but also enhance the overall quality of your baked goods. So grab your slicer, put these tips into practice, and enjoy perfectly sliced bread every time. Happy baking!
FAQs: Everything You Need to Know About Bread Slicers
- Can I slice warm bread with a bread slicer?
It’s best to let bread cool for at least 30 minutes to avoid crumbling. Warm bread is too fragile for clean cuts. - How often should I clean my bread slicer?
Clean your slicer after every use to prevent buildup. Deep-clean and lubricate blades monthly for optimal performance. - What if my slices aren’t even?
Double-check your slicer’s alignment and adjust the loaf position within the guide. Practice steady, slow slicing motions. - Are bread slicers worth the investment?
Yes! Bread slicers improve efficiency, reduce waste, and ensure consistent results—perfect for both casual bakers and professionals. - Can I use a bread slicer for other foods?
Absolutely! Many slicers work well for cakes, baguettes, or even soft cheeses. Just adjust settings accordingly