
How nanalan cake Became a Viral Hit: Follow These 8 Easy Moves
Table of Contents
How nanalan cake Became a Viral Hit
Imagine this: A simple cake recipe that takes the world by storm, capturing hearts and taste buds alike. But what exactly is it about the nanalan cake that has made it such a viral sensation? Is it the rich buttery flavor, the soft texture, or perhaps its versatility in flavors and presentations? Let’s dive into the story behind why this dessert became everyone’s favorite and how you can easily recreate it at home with just eight easy steps.
Overview of the Nanalan Cake
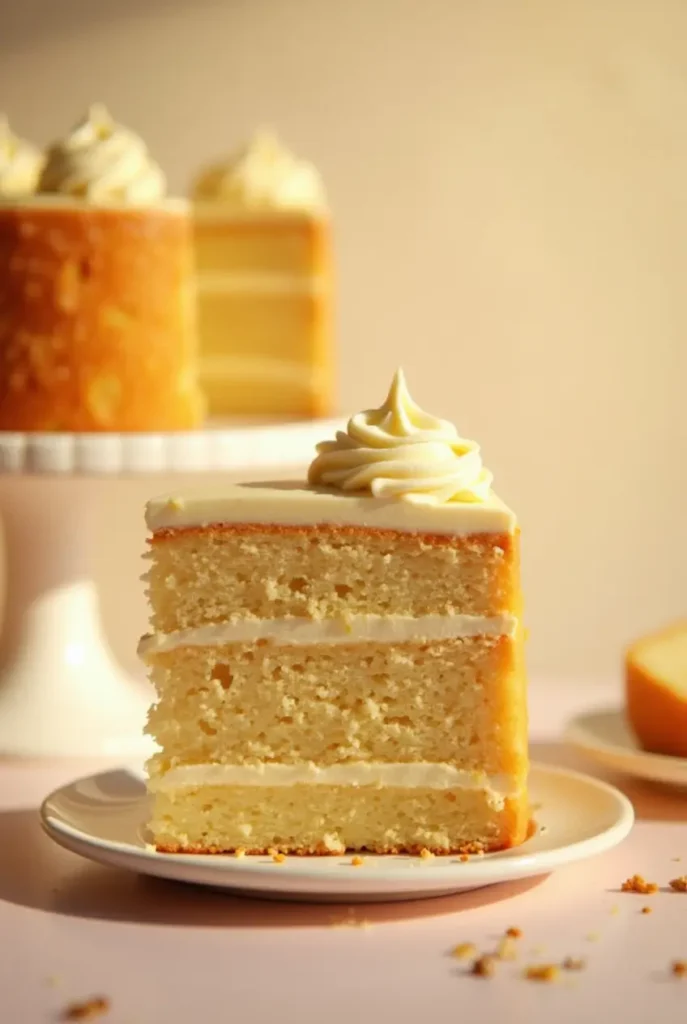
The nanalan cake is more than just your average sweet treat; it’s an experience! Known for its moist crumb, creamy layers, and customizable options, this cake stands out from the crowd. Typically requiring around 1 hour 30 minutes from start to finish, including preparation and baking time, it ranks as moderately easy to prepare, making it perfect for both novice bakers and seasoned pros alike. Whether you’re celebrating a special occasion or simply craving something delicious, this recipe promises satisfaction every time.
Essential Ingredients for Your Perfect Nanalan Cake
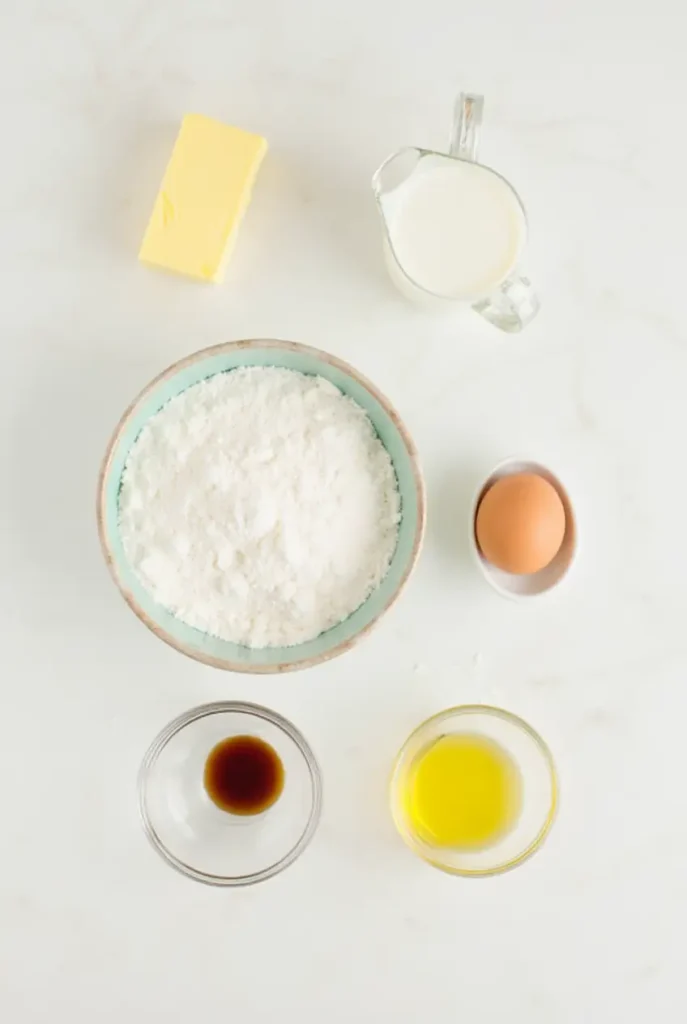
Before we get started on our journey to bake perfection, let’s talk ingredients. Here are the main components needed to create your own masterpiece:
- Flour : Acts as the structure builder in cakes, providing stability while still allowing for lightness.
- Sugar : Not only does sugar add sweetness but also contributes to tenderness and browning during baking.
- Eggs : Serve dual purposes – they bind everything together and contribute moisture and richness.
- Butter : Adds unmatched flavor and helps achieve that melt-in-your-mouth quality.
- Milk : Moistens the batter and enhances creaminess when combined with other fats like butter.
- Vanilla Extract : Brings warmth and depth to the overall taste profile.
- Baking Powder/Soda : Leavening agents responsible for creating air bubbles within the mixture, resulting in fluffy baked goods.
- Salt : Balances flavors and enhances natural sweetness without overpowering them.
For those looking to tweak traditional recipes, consider experimenting with alternative flours (such as almond flour for gluten-free versions), substituting dairy milk with plant-based alternatives, or even opting for vegan butter substitutes.
Step-by-Step Instructions to Bake Your Nanalan Cake
Preparation
- Preheat your oven according to package instructions typically between 350°F–375°F (175°C–190°C).
- Grease two round cake pans lightly using nonstick spray or butter before dusting them with flour.
- In a large mixing bowl, whisk together dry ingredients including flour, sugar, baking powder, and salt until well combined.
- Create a well in the center of the dry mix where wet ingredients will go next.
Mixing Wet & Dry Ingredients
- Beat softened butter and sugar until light and fluffy – approximately three minutes.
- Add eggs one at a time, ensuring each egg fully incorporates before adding another.
- Stir in vanilla extract followed by alternating additions of milk and half portions of flour mixture until smooth consistency forms.
Baking Process
- Divide batter evenly among prepared pans then smooth tops gently with spatula.
- Place pans inside preheated oven and bake for about 25–30 minutes or until toothpick inserted comes out clean.
- Allow cakes to cool completely before assembling further.
Assembly Tips for Stunning Presentation
Once your cakes have cooled down sufficiently, it’s time to bring them together beautifully!
- Begin by placing one layer flat side up onto serving plate.
- Spread peanut butter filling generously across top surface ensuring edges remain untouched for structural integrity.
- Carefully position second layer atop first pressing down slightly yet firmly.
- Frost entire exterior with buttercream icing smoothing sides and top carefully.
- Decorate freely according to personal preference whether sprinkles, fresh fruits, edible flowers, etc., all work wonderfully here!
Remember presentation plays a huge role so take pride in crafting visually appealing slices too!
Storage And Make-Ahead Tips
To keep your nanalan cake tasting fresh over several days follow these guidelines:
- Store leftovers tightly wrapped in plastic wrap inside refrigerator up to four days.
- For longer storage freeze individual pieces layered between parchment papers inside airtight container good for months.
- Reheat slices briefly either via microwave or conventional oven set low heat restoring initial warmth quickly.
Recipe Variations To Suit All Tastes
While classic versions always delight there exist numerous ways to personalize your nanalan cake further:
- Infuse chocolate chips throughout batter adding extra decadence.
- Experiment with fruit infusions such strawberries, blueberries enhancing natural flavors.
- Optimize healthier choices through whole grain flours, reduced sugars, or even raw honey replacements.
- Explore international twists incorporating matcha green tea powder or coconut flakes bringing exotic flair.
Conclusion
There you have it—a comprehensive guide covering everything necessary to master the art of crafting mouthwatering nanalan cakes right at home. With its straightforward process, impressive results, and endless possibilities for creativity, who wouldn’t want to give this delightful dessert a try? So gather your supplies, roll up your sleeves, and embark upon this sweet adventure today because once tasted, no one forgets their first encounter with nanalan cake magic 2.
FAQs About Making Nanalan Cakes
Q: Can I make this ahead of schedule? Absolutely! As mentioned earlier under storage tips section, freezing unbaked portions ensures freshness whenever ready to serve later.
Q: Are there any health benefits associated with eating nanalan cakes? Although primarily considered indulgent treats, certain modifications can introduce beneficial nutrients depending upon ingredient selections used—like fiber-rich grains or antioxidant-packed berries.
Q: What if my cake doesn’t rise properly? Ensure accurate measurements especially regarding leaveners; check oven temperature accuracy too since incorrect settings may hinder rising success rates.